A fully built overland slide-in camper looks like the shortcut to a capable backcountry rig. Solar panels are already mounted, the water system is plumbed, and somebody else has spent months sorting the wiring. That convenience can be worth real money. It can also hide a camper that is too heavy for the truck, too complicated to repair, or assembled with hardware that belongs in a weekend trailer instead of on a washboard road.
I have spent enough time recovering expensive mistakes from the Mojave and the Arizona high country to know the difference. A good camper makes camp easier without making the truck miserable. A bad one turns a two-hour forest road into a suspension autopsy. If it has not broken in the backcountry, I do not recommend it.
Start with the truck, not the floor plan
The first inspection is not the kitchen, bed, or shower. It is the truck’s payload sticker. Find the gross vehicle weight rating on the driver-side doorjamb, then subtract the truck’s actual loaded weight. Include passengers, fuel, recovery equipment, tools, water, food, firewood, and the camper itself.
A half-ton truck might show a tempting payload number when new, but a steel bumper, winch, larger tires, and drawer system can consume several hundred pounds before the camper arrives. A three-quarter-ton truck gives you more margin, but its rear axle rating still matters. Weigh the rig on a certified scale with the camper loaded and ready for a trip. Guessing is how rear springs become the most expensive part of your vacation.
A fully built overland slide-in camper should have a documented wet weight, not a brochure dry weight. “Dry” often excludes propane, batteries, water, awnings, and basic camping equipment. Ask for front and rear axle weights separately. If the manufacturer cannot provide them, bring a scale ticket or walk away.
Mounting deserves the same suspicion. Inspect bed rails, tie-down points, turnbuckles, and any frame-mounted brackets for elongation, cracked welds, or shiny metal where parts have been moving. The camper should be secured without forcing the truck bed to carry loads it was never designed to handle.
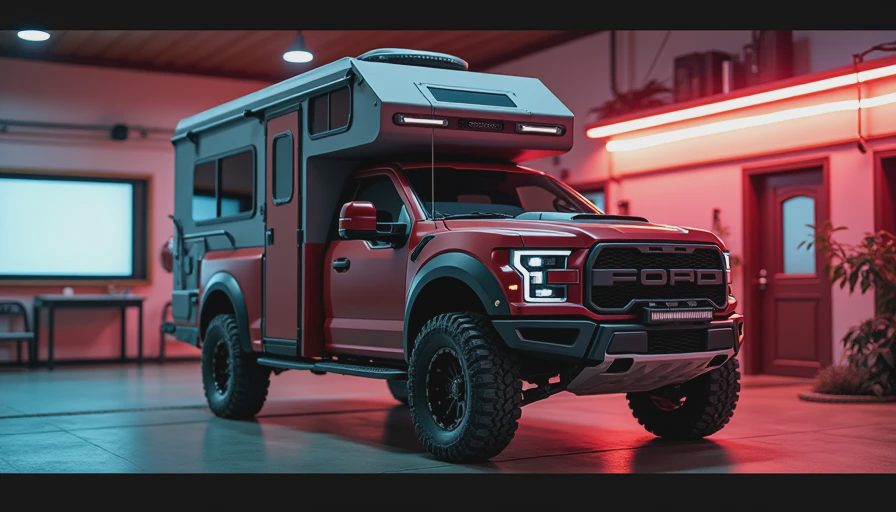
What a real overland build should include
The strongest builds are simple. A lithium battery, a properly fused distribution panel, a modest solar setup, and a reliable DC-to-DC charger are easier to diagnose than a maze of unlabeled cables. Every circuit should have a fuse close to its power source. Wires should be protected where they pass through aluminum, wood, or sheet metal, and the negative side should be just as carefully installed as the positive side.
Water systems need practical service access. I want to see a shutoff valve, replaceable hose connections, a drain point, and a pump that can be removed without dismantling the entire galley. A 20- to 30-gallon tank is useful for many trips, but carrying more water adds roughly 8.3 pounds per gallon before the tank and mounting hardware are counted. Put that weight low and near the truck’s center, not high behind the rear axle.
For heating, a diesel or gasoline air heater can be excellent when installed with proper combustion-air and exhaust routing. The exhaust must terminate outside the living area, and carbon monoxide protection is mandatory. A portable stove should never be treated as an indoor heating system. Fancy electronics do not compensate for poor ventilation.
The shell itself should be checked at every corner. Look for sealant that is separating, rivets with white oxidation around them, stress cracks near windows, and doors that no longer latch squarely. Those signs point to flex, water intrusion, or both. Open cabinets and inspect their backs. Builders sometimes make the front look finished while leaving raw edges and unsupported panels where vibration does its work.
A fully built overland slide-in camper should also have a recovery plan. Can you access the battery, water pump, heater, and fuse panel with a screwdriver and basic socket set? Can the camper be unloaded if the truck needs suspension work? If the answer is no, the design is not expedition-ready; it is merely showroom-ready.
Suspension, tires, and the part most buyers forget
The camper is only half the system. The truck needs spring capacity, damping, braking, and tires matched to the new load. Airbags can help level a truck, but they do not automatically increase its legal payload or fix an overloaded axle. They are a tuning tool, not a magic payload upgrade.
Ask whether the truck has progressive rear springs, upgraded dampers, or a suspension package selected for the actual loaded weight. A rig that rides acceptably on pavement may still bottom out on corrugations. On one build I inspected after a run near Moab, the rear bump stops had deep impact marks and the shock bodies were leaking. The owner had spent nearly $2,000 on camper cabinetry but had not weighed the finished truck once.
Tires should have an appropriate load range and enough sidewall for the terrain without being inflated blindly to the maximum number on the sidewall. Set pressures from the loaded axle weights and tire manufacturer guidance, then adjust for sand, rock, and washboard conditions. Recheck pressures and fasteners after the first 100 to 200 miles of rough travel.
How to inspect a used camper before money changes hands
Bring a flashlight, digital scale readings if available, a moisture meter, a multimeter, and a small socket set. Run every faucet, light, fan, heater, refrigerator mode, inverter, and charging source. Do not accept “it worked last season” as a test result. A dormant pump or corroded connector does not improve with age.
Inspect the roof after rain or use a hose carefully around windows and roof penetrations. Check floors near the entry, bathroom, and water tank. Soft flooring is not a cosmetic problem; it can indicate rot underneath. Smell the cabinets. Damp plywood has a signature that no amount of air freshener can hide.
Drive the truck over uneven pavement with the camper loaded. Listen for clunks, bed contact, rattling cabinetry, and doors opening under body flex. Then inspect the tie-downs again. If bolts have backed out, mark them with paint after tightening so movement is visible on the next trip.

New build or used rig: where the value really sits
A new fully built overland slide-in camper may cost anywhere from the high five figures to well beyond $100,000 once the truck, suspension, electronics, and interior options are included. That price buys warranty coverage and a chance to specify the layout, but the first owner still becomes the field tester. Plan a short shakedown trip before committing to a long remote route.
A used build can offer better value because the original owner already paid for solar, cabinetry, and mounting hardware. Look for service records, wiring diagrams, scale tickets, and photos from construction. A camper with scratches from real travel is not automatically suspect. I would rather inspect honest trail wear than a spotless unit that has spent its life plugged into a driveway.
Budget at least several thousand dollars for immediate correction on a used rig. That reserve covers tires, seals, batteries, suspension tuning, fasteners, and the small failures that appear once vibration starts. If the purchase leaves no repair budget, it is too expensive.
The field-ready checklist
Before departure, weigh the complete rig, confirm axle limits, torque mounting hardware, and test every electrical circuit. Carry spare fuses, hose clamps, a water-line repair kit, crimp connectors, heat-shrink tubing, and the tools required to reach the camper’s service panels. Keep a printed wiring diagram in a waterproof pouch because phones become decorative objects when the canyon walls block signal.
Choose a fully built overland slide-in camper because its systems are accessible, its weight is honest, and its structure has survived hard miles—not because its brochure has the longest option list. Start with a local overnight, then a rough two-night route near home. Record every rattle, leak, loose screw, and voltage problem. Fix those before heading toward a trailhead where the nearest parts store is a two-hour walk.
That is the standard I use in my own garage and on guided runs out of Flagstaff. If the builder can explain the weak points, show the service access, and produce real weight numbers, keep inspecting. If the answer is a glossy photo and a promise that nothing has ever failed, leave the deposit in your pocket.