Every week, someone walks into a shop and says: "I want a lift kit. How much can you give me?"
They're always disappointed when I don't say "six inches." Sometimes they're annoyed. Once a guy actually laughed and said, "Come on, I've got the budget."
I didn't sell him a lift kit. I don't do that anymore. But if I was still behind the counter, I'd probably tell him the same thing I'm about to tell you:
Two more inches is usually the wrong answer. Here's why.
The First Question Nobody Asks
Before we talk about springs, shocks, or control arms, let's stop and ask the question that should always come first:
Why do you want a lift?
If the answer is "so it looks cool" — I'm not judging. I've done plenty of things to vehicles for that exact reason. But that's a cosmetic choice, not a functional one. And if we're talking about function, the answer changes everything.
Are you running bigger tires? You only need enough lift to clear them at full compression and full steering lock. That's it. Not an inch more.
Are you adding weight? Bumpers, winch, sliders, skids, roof rack, RTT, gear — all of that changes spring rate requirements more than lift height does.
Are you chasing articulation? A well-tuned suspension at stock height often out-flexes a poorly tuned suspension at 3 inches. Height doesn't buy travel. Geometry buys travel.
Are you chasing approach/departure/breakover angles? Yes, height improves those. But tire diameter improves them more. And tire diameter doesn't require as much lift as you think.
Here's the brutal truth: for 90% of the trails most people run, a 1.5- to 2.5-inch lift with properly matched springs and shocks will outperform a 4-inch lift with mismatched components. Every time. And it'll do it with better road manners, longer component life, and fewer broken parts.
I've seen it happen more times than I can count.
Spring Rate: The Number Everyone Ignores
Every lift kit comes with springs. But not every spring is right for your vehicle. Not even close.
Spring rate is measured in pounds per inch — how much weight it takes to compress the spring by one inch. A 200 lb/in spring needs 200 pounds to sink one inch. A 400 lb/in spring needs 400 pounds.
Sounds simple. But here's where it goes sideways:
Most lift kits ship with springs designed for a stock vehicle. No winch. No bumper. No drawer system. No roof rack. And they're fine for that vehicle. But the second you add 400 pounds of steel and gear, those springs sag. You lose an inch. The ride turns to mush. The dampers can't keep up because they're working outside their intended travel window.
Here's what I do instead:
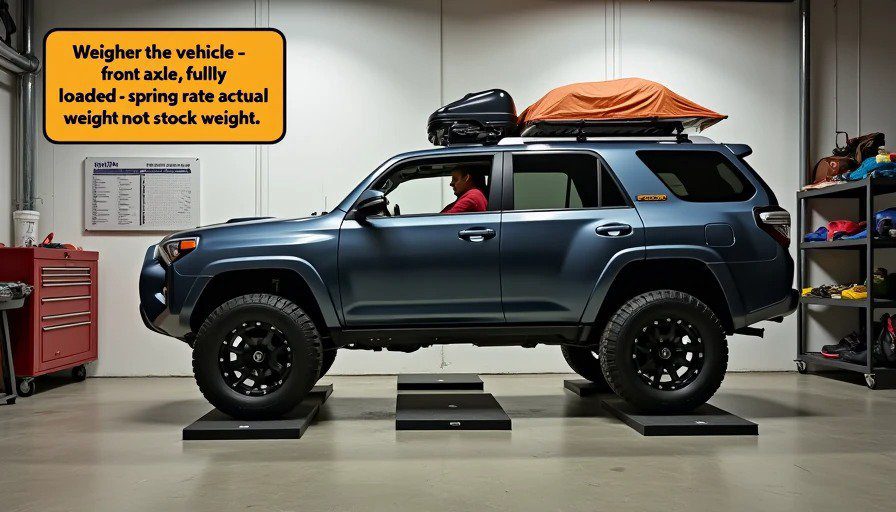
Weigh the vehicle — front axle, rear axle, total. Fully loaded, with everything you actually run on the trail. Not empty. Not "I'll add it later." Loaded.
Calculate the sprung weight — subtract the unsprung weight (tires, wheels, axles, brakes, part of the control arms). If you don't have a scale, estimate generously.
Pick a spring that gives you the desired lift at that weight. Not at stock weight. At your weight.
Example: A 4Runner stock front spring might be 600 lb/in and sit at 19.5 inches. Add a steel bumper and winch — 150 pounds. That spring drops to 19.0 inches. Add a 1-inch spacer to compensate? That's what bad shops do. The right answer is a 650-700 lb/in spring that sits at 20.5 inches with the weight on it.
Spring rate is the foundation. Get it wrong and everything else is just noise.
Shock Valving: The Difference Between "Lifted" and "Drivable"
Lots of people spend big money on springs and cheap out on shocks. I've never understood this. The spring holds the vehicle up. The shock controls how it moves. A bad spring with good shocks rides okay. A good spring with bad shocks rides like a covered wagon.
The key spec on any shock is valving — how stiff the damping is during compression and rebound. And valving is a graph, not a single number.
Here's the simplified version:
Compression damping — controls how fast the suspension compresses when you hit a bump. Too stiff, and the chassis gets jarred. Too soft, and the shock bottoms out.
Rebound damping — controls how fast the suspension extends after compressing. Too stiff, and the suspension packs down over washboard, never fully resetting for the next hit. Too soft, and the vehicle bounces like a basketball.
Good lift kits come with shocks that are valved for the spring rate they're paired with. Cheap lift kits come with generic shocks that work on everything and excel at nothing.
Here's a mistake I made myself — more than once:
Bought a lift kit with "adjustable" shocks. Turned them to the stiffest setting because I thought "more = better" for handling. The ride was miserable. Everything rattled. The tires skipped over rocks instead of conforming to them. I backed off all the way to the softest setting and went the other direction, slowly dialing it up until the ride felt controlled but compliant.
The lesson: There's no single "right" setting. It depends on your vehicle weight, your terrain, and your driving style. Start soft and work up. Not the other way around.
Suspension Geometry: The Hidden Complexity
You lift a vehicle two inches. Now every suspension joint is at a different angle. The control arms are steeper. The track bar is shifted. The drag link is angled differently.
Your alignment specs change.
Your bump steer changes.
Your roll center changes.
And none of these are solved by just "adding lift."
Here's what actually matters, in order of priority:
Maintain correct alignment — caster, camber, toe, all within spec for your new ride height. Some lifts don't provide enough caster correction. If your steering doesn't self-center after a turn, you don't have enough caster.
Correct the panhard/track bar geometry — if your front and rear track bars aren't parallel to the ground at ride height, your axle shifts sideways during articulation. That's bad. Adjustable track bars fix this. So do track bar relocation brackets. Pick one. Don't skip this step.
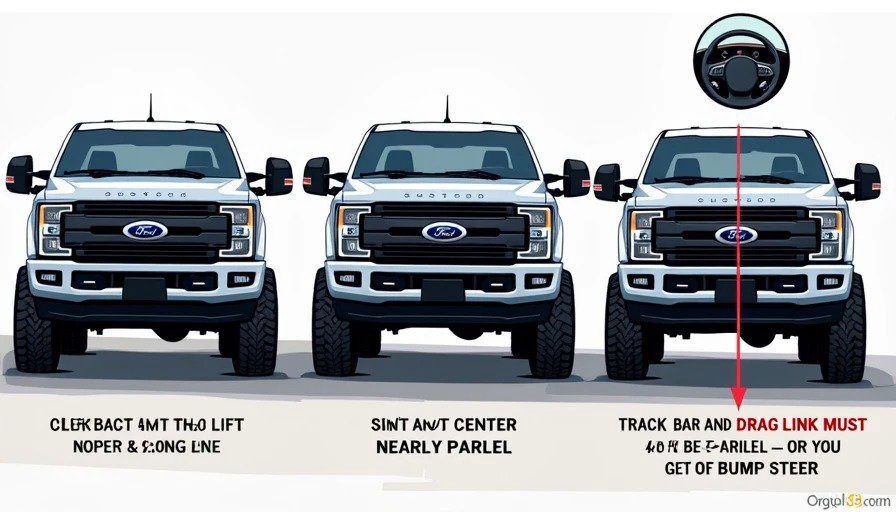
Address bump steer — when the drag link and track bar aren't parallel, hitting a bump sends the steering wheel twisting in your hands. That's bump steer. It's unnerving on pavement and dangerous on trail. The fix is a dropped pitman arm or raised track bar mount. Not both. One or the other, matched to your lift height.
Watch your brake lines, ABS wires, and breather tubes — at full droop, any of these can stretch and break. Extended lines are cheap. Broken ABS wire on a trail is not.
If you're doing a lift over 3 inches, you're also looking at:
Adjustable upper and lower control arms — to correct caster and pinion angle
Extended sway bar links — or better yet, quick disconnects
Bump stop extensions — to keep your tires from eating your fenders at full compression
A 2-inch lift might cost you $1,200 in parts. A 4-inch lift that actually works — with all the geometry correction — costs closer to $3,500. The people who skip the geometry corrections are the ones I see on the trail with death wobble, worn-out bushings, and steering that wanders all over the road.
The Budget Reality Check
Here's a number that surprises a lot of people:
A properly built 2-inch lift on a midsize SUV will outperform a half-assed 4-inch lift on every metric that matters.
Better ride quality
Better articulation
Better reliability
Better on-road handling
Better parts availability
Fewer things to break
And it costs less. Sometimes half as much.
I'm not saying you should never go tall. If you're running 37s on a Rubicon trail rig, you need the height. But that's a specialized build, not an overlander. Most of the rigs I see on the trail could do 95% of what they do with a 2-inch lift, proper tires, and a driver who knows how to pick a line.
The extra 2 inches? That's ego. And ego doesn't help you get home.
How I Do It
Here's my process for picking a lift kit today. It hasn't changed in years:
Set a functional goal first. What am I actually trying to do? Clear a certain tire size. Improve breakover angle. Carry more weight without sagging. Keep the vehicle stable on washboard. That's the goal. Height is just a number that serves it.
Weigh the vehicle. Front and rear. Loaded. No exceptions.
Pick springs for that weight. Call the manufacturer, talk to a human, tell them your actual axle weights. If they can't tell you the spring rate, move on to a brand that can.
Choose shocks valved for those springs. If the kit doesn't list valving specs, keep looking. Generic shocks aren't worth the box they ship in.
Buy the geometry correction parts the lift actually needs. Not the ones the website recommends. The ones the suspension actually needs. If you're going over 2.5 inches, that means adjustable control arms and a track bar correction.
Install it. Torque everything to spec. Not "tight enough." Torque spec. Then drive it 500 miles, re-torque everything, and get an alignment.
This process takes longer than clicking "add to cart." It costs more than the cheapest option. But I've never had to replace a lift kit that was built this way.
What I've Learned
Here's what twelve years of installing lift kits taught me:
The lift height doesn't matter as much as spring rate and shock valving
Geometry correction isn't optional — it's the difference between a truck that drives straight and one that wanders
Cheap lift kits cost more in the long run
The "I'll fix it later" approach on alignment usually means you never fix it
And the biggest lesson: most people lift their vehicles further than they need to and end up with worse performance than if they'd just gone 2 inches and spent the extra money on better tires and armor
The number of times I've seen a guy on 35s and a 4-inch lift get passed by a stock Jeep on 33s driven by someone who knows what they're doing? Let's just say it's more than once.
Lift your rig for function. Not for a tape measure. And if you're not sure what function you're chasing, spend a season running trails at stock height. Get stuck a few times. Figure out what actually stops you. Then build for that.
You'll save money. You'll save wear and tear. And you'll end up with a truck that's more capable — not just taller.
The Takeaway
If I was building a rig for 90% of overlanders today, I'd go:
1.5- to 2.5-inch lift
Springs matched to the actual loaded weight
Shocks valved specifically for those springs
Corrected control arms and track bar
33-inch tires (or 35s if the platform supports them without going over 2.5 inches)
And I'd spend the money I saved on lockers, recovery gear, and armor
That truck will go places. It'll get you home. And it won't beat you up on the highway getting there.
You don't need six inches of lift. You need the right two inches. Everything after that is just compensating for something else.