A trailer off road hitch is not just a heavier ball mount with a marketing sticker. It is the joint between your tow vehicle and everything behind it, and on rough ground that joint sees twisting loads a highway hitch never experiences. I have watched ordinary couplers bind on ledges, bend safety-chain tabs, and turn a simple recovery into a long walk. If you are building an overland trailer for the Mojave, Arizona back roads, or a summer run through the Rockies, choose the connection before you spend money on paint, awnings, or a fancy kitchen drawer.
Why a trailer off road hitch needs articulation
A standard ball coupler works well when the tow vehicle and trailer stay mostly level. On a washboard road, the suspension moves independently. On a ditch crossing, one tire can climb while the other three stay low. The trailer may roll 20 or 30 degrees relative to the truck, while the coupler still needs to pull, pivot, and release without binding.
That is where an articulated trailer off road hitch earns its keep. Common designs use a lunette ring, yoke, pin, or multi-axis joint instead of relying on a ball sitting inside a socket. The goal is controlled movement in pitch, yaw, and roll. More articulation does not automatically mean more strength, though. A poorly mounted joint can transfer the load into a thin trailer tongue and crack the frame around the welds.
Look at the complete system. Check the hitch rating, trailer gross weight, tongue weight, mounting plate thickness, fastener grade, and the trailer frame itself. A 10,000-pound coupler bolted to a weak tongue is still a weak link. I would rather have a properly gusseted 7,000-pound setup than a high-rated coupling attached with four undersized bolts and optimism.
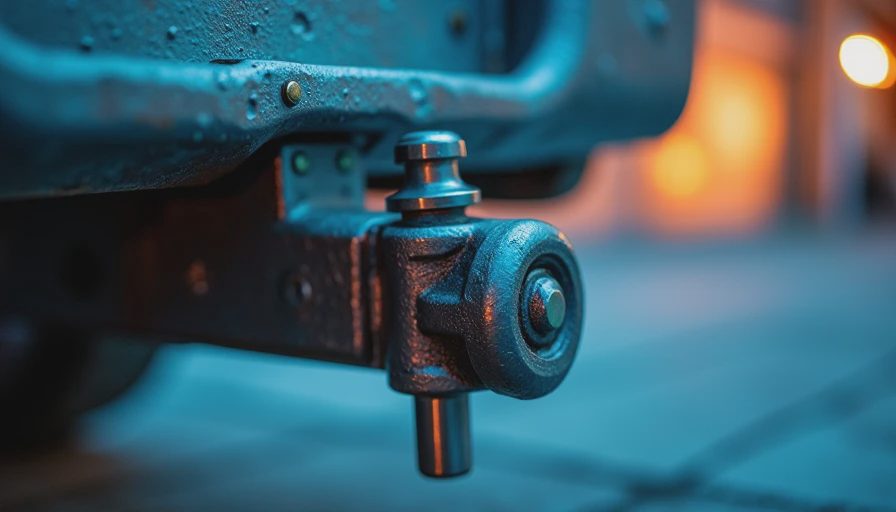
The hitch styles worth considering
A rotating pintle-style connection is simple, durable, and tolerant of mud. It is common on utility and military-inspired trailers because it can handle angular movement without asking a ball to remain perfectly aligned. The tradeoff is noise. A pintle can rattle on pavement, especially when the ring and hook are worn or adjusted loosely.
A Lock-N-Roll-style articulating coupler uses a mating joint designed for multi-directional movement. This type is often quieter and more compact than a loose pintle, but it depends on correct alignment and regular inspection of the retaining hardware. The coupler must match the vehicle-side receiver or drawbar; improvising with random pins defeats the design.
A Max Coupler-style system uses a rotating joint and a locking mechanism intended for off-pavement trailer movement. It can be a clean solution for a purpose-built expedition trailer, particularly when you want a tighter connection than a traditional pintle. Installation still matters more than the brochure. Measure the height, allow room for suspension compression, and verify that the joint cannot contact the bumper, spare tire, or recovery gear at full articulation.
How to size a trailer off road hitch correctly
Start with actual weights, not the number printed on a tire placard. Weigh the loaded trailer with water, fuel, tools, recovery boards, spare parts, food, and the gear that somehow appears before every trip. Then measure tongue weight while the trailer is level. Many conventional trailers run comfortably around 10 to 15 percent tongue weight, but the correct figure depends on the trailer design and manufacturer guidance.
Next, inspect the drawbar and receiver. A trailer off road hitch can articulate perfectly while the tow vehicle receiver twists under load. A long drop hitch increases leverage and can bend more easily on a departure angle. Keep the connection as short and high as practical without creating interference. If you tow with a lifted truck, do not automatically use a massive adjustable drop. Measure the coupler height, account for loaded suspension sag, and choose the smallest safe height difference.
The safety chains deserve the same attention. Cross them under the coupler so they can catch the tongue if the connection separates. Leave enough slack for a tight turn, but not enough to drag through rocks. Route the breakaway cable independently to a solid point on the tow vehicle. It should activate the trailer brakes if the trailer separates, not hang from the safety-chain loop where it can be pulled accidentally.

Installation details that prevent field failures
Before installing a trailer off road hitch, strip paint from the mounting surfaces and check that the tongue is square. Use the fasteners specified by the manufacturer, torque them with a calibrated wrench, and mark the bolt heads with a paint pen. That small mark gives you a quick visual check after a rough day. If the marks move, investigate before driving another hundred miles.
Gussets are useful when they spread force into the top, bottom, and sides of the tongue. They are not a substitute for proper design. Welding a thick plate over a cracked frame can trap the original failure underneath. Grind out damaged metal, inspect for distortion, and let a qualified welder repair structural components. On a trailer carrying fuel, welding also requires safe tank removal and ventilation; this is not a good place to rush.
Cycle the connection before the first trip. Jack the trailer until the suspension reaches full droop, turn the tow vehicle sharply, and check every contact point. Then compress the suspension as far as practical. Watch the electrical cable, breakaway cable, chains, spare tire, and tongue jack. A trailer off road hitch that clears in the driveway can still bind when one rear tire is on a rock and the trailer is twisted hard.
Maintenance after dirt, water, and dust
Articulating parts need inspection, not just a shot of grease before departure. After a muddy trip, wash grit from the joint and inspect pins, bushings, retaining clips, and welds. Sand can act like grinding compound inside a rotating connection. Follow the manufacturer lubricant instructions; some joints need grease, while others use a dry lubricant or sealed bearing arrangement.
Check for ovalized pin holes, shiny contact marks, cracked weld toes, and fresh rust lines. Those marks often reveal movement before a complete failure. Measure wear against the service limits in the instructions rather than guessing by feel. Replace inexpensive pins and bushings before they damage the larger housing.
I also inspect the receiver and trailer tongue every time the rig returns from a difficult route. A trailer off road hitch may survive while the surrounding steel begins to deform. Photograph suspicious areas, record the trailer mileage, and note the load and terrain. That log becomes useful when deciding whether a component is wearing normally or starting to fail.
A practical pre-trip check
The night before departure, confirm the coupler is fully locked and secured with its retaining pin. Verify the hitch pin, safety chains, breakaway switch, electrical plug, trailer lights, tire pressures, and wheel-lug torque. Look under the trailer for new cracks or bent brackets. Tug on the connection by hand after the jack is raised; it should not show unexplained looseness.
Carry a spare retaining pin, the correct wrench, a torque wrench if space allows, grease or approved lubricant, and a way to support the tongue safely. A spare coupler is harder to carry, but a repair plate and basic welding plan can be worth more than another camp accessory on a remote trip.
For most serious overland builds, a trailer off road hitch is money better spent than decorative armor or oversized lights. Buy for articulation, mount it to sound structure, and inspect it like a part that can strand you. I have seen too many clean-looking rigs fail at the least glamorous connection point. If it has not broken in the backcountry, I do not recommend it. Build the joint carefully, test it loaded, and then earn your confidence on dirt before committing to a remote route.