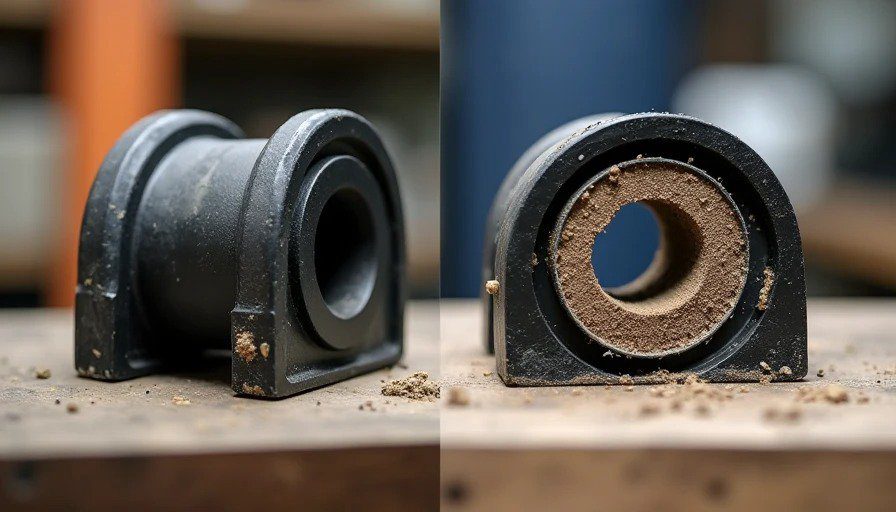
Most people don't think about bushings.
They're not glamorous. They're not expensive. They don't show up on a build list with a bold font and a price tag that makes you wince. But they're the thing that keeps your suspension working predictably, your alignment holding, and your steering feeling like it's connected to the wheels instead of just vaguely suggesting direction.
I pulled this control arm bushing off my 4Runner at 105,000 miles — 18,000 miles after the frame-up rebuild, and about 40,000 miles total on the control arms themselves. From the outside, it looked fine. No cracks. No tears. No grease weeping out. I was replacing the bushings because the vehicle had developed a wandering feel on highway and a steering vagueness that made me think the rack was going. I swapped the bushings as a cheap diagnostic step before spending big money on a new rack.
That step cost me $60 in parts and one hour of shop time. And it solved the problem entirely.
The bushing looked fine on the outside. The inside told a very different story.
The Setup: Where This Bushing Came From
Vehicle: 2016 4Runner Trail
Miles on vehicle: 105,000 total
Miles on these control arms: 40,000 (installed during Phase One of the build)
Miles on this bushing since last inspection: 18,000 (post-rebuild)
Terrain: Mojave sand, Utah rocks, Colorado mud, Arizona washboard, numerous water crossings, daily driving on paved roads
Pre-bushing issues:
Wandering steering on the highway — the truck would wander slightly from side to side without input, requiring constant small corrections to keep it in the lane.
Alignment drift — I'd get an alignment, and within 500 miles, the toe would be out again. The shop said the alignment was "walking" and recommended replacing the rack.
Steering vagueness — not a clunk or a thunk, just a sense that the front wheels weren't as directly connected to the steering wheel as they used to be. The truck felt lazy on turn-in.
What I did: Replaced all four front control arm bushings (two on each lower control arm, two on each upper control arm) with factory-style rubber bushings. Cost: $240 for all eight bushings, plus $100 for alignment. That solved the wandering and the alignment drift.
What I didn't do: I didn't replace the control arms themselves. They were still structurally solid. The bushings were the problem.
The Autopsy: Cutting It Open
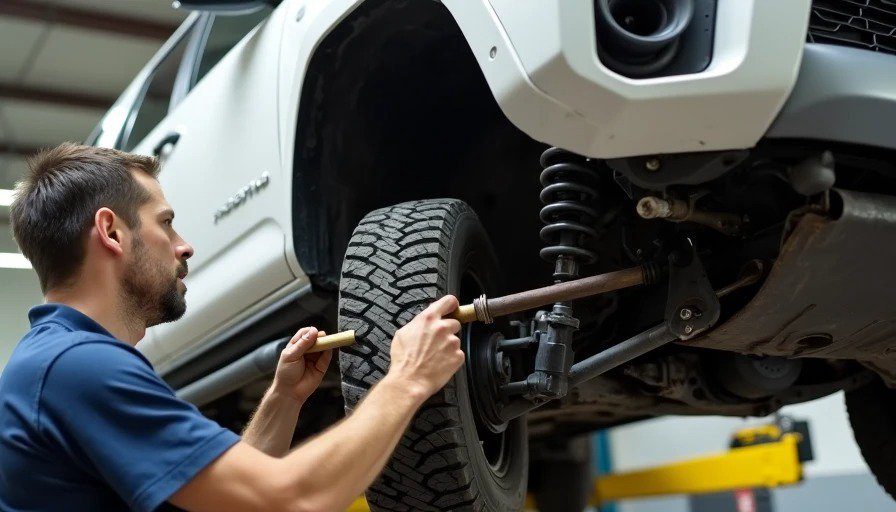
Before I replaced the bushings, I took one of them — the rearward lower control arm bushing, which sees the most load under hard braking and acceleration — and cut it open on the band saw. I wanted to know why a bushing that "looked fine" was failing.
Here's what the autopsy revealed, section by section.
The Construction: How This Bushing Is Built
The lower control arm bushing in a 5th-gen 4Runner is a typical bonded-rubber bushing:
Outer shell: Steel, pressed into the control arm. The shell is a press-fit in the arm bore, and the bushing assembly is held in place by friction and the clamping force of the mounting bolts.
Rubber layer: Bonded to both the outer shell and the inner sleeve. The rubber is a specific durometer (hardness) and is designed to allow a controlled amount of radial and axial deflection. It's not solid rubber — the shape has voids and channels that allow it to flex in specific directions while remaining stiff in others.
Inner sleeve: Steel, through which the mounting bolt passes. The bolt clamps the inner sleeve against the frame mount, pinching it so that the inner sleeve stays static. The rubber then flexes around the inner sleeve, allowing the control arm to move up and down.
The rubber is bonded to both the outer shell and the inner sleeve during manufacturing. When it's new, the rubber is chemically bonded to the steel surfaces, and the bushing works as one unit.
That's how it should look. Here's what mine looked like after 18,000 miles of dirt.
What I Found: The Disbonded Rubber
I cut the bushing in half lengthwise, exposing the rubber layer between the outer shell and the inner sleeve.
The rubber was separated from the inner sleeve. The chemical bond was gone, and the rubber was no longer attached to the inner sleeve along about 40% of its circumference. You could see visible gaps between the rubber and the steel.
What it looked like: Dark gray rubber with a metallic sheen. The rubber surface was shiny and smooth where it had been rubbing against the inner sleeve. The steel sleeve had wear marks — not deep, but enough to see a polished surface where the rubber had been sliding back and forth.
What it means: The rubber had separated from the metal, and the bushing was no longer doing its job. Instead of flexing within the rubber, the inner sleeve was rotating within the bushing assembly, allowing the control arm to shift back and forth under load. That shifting was what caused the toe alignment to drift — the control arm was literally walking back and forth by fractions of a millimeter, and those fractions added up to measurable toe changes under the vehicle.
The Contamination: Sand in the Gap
The most interesting discovery came when I looked at the side of the bushing.
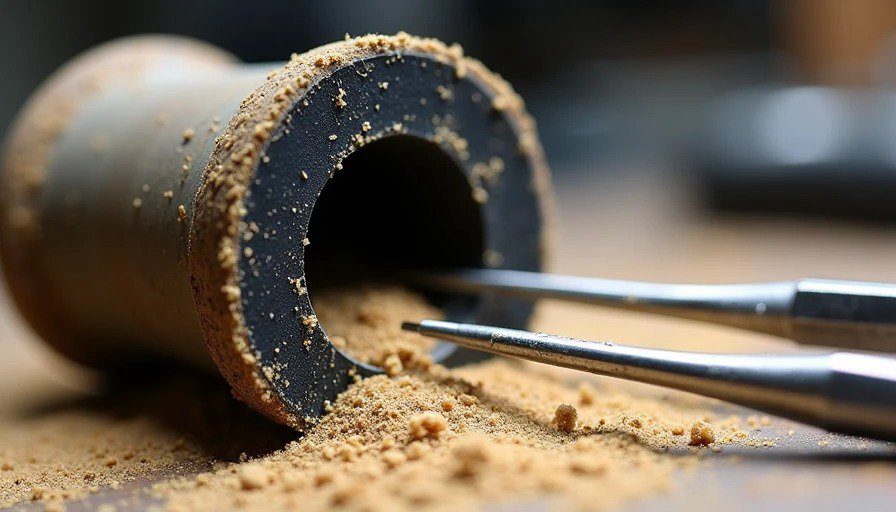
Where the rubber had separated from the inner sleeve, there was a gap. And inside that gap were fine grains of sand.
What it looked like: The sand was packed into the gap between the rubber and the inner sleeve. It had worked its way into the bushing over time — probably through the end of the bushing where the rubber meets the steel, where a small gap had opened up.
What it means: The sand acted as an abrasive. Every time the suspension cycled, the sand ground against the rubber and the steel, accelerating the wear and the separation. The rubber that had already separated from the steel was being slowly abraded by the sand, making the gap larger over time.
The sand didn't cause the separation — that was a result of heat, load, and age — but it accelerated the failure significantly. Without the sand, the bushing might have gone another 20,000 miles before the separation got bad enough to cause steering issues. With the sand, it was failing at 18,000.
The Rubber Condition: Heat-Aged and Brittle
I cut a thin section of the rubber for closer inspection. The rubber was noticeably harder than it should have been — I could barely indent it with my fingernail, whereas new bushing rubber compresses easily.
What it looked like: The rubber had small cracks on the surface where it had been bonded to the inner sleeve. Not the big cracks you'd see on a torn tire, but the kind of surface cracks that come from heat aging — where the rubber has gotten brittle and is starting to micro-crack under load.
What it means: This rubber was heat-aged. 18,000 miles of off-road use — desert heat, sustained highway speeds, repeated load cycles — had degraded the rubber compound. It had lost its flexibility and was no longer able to absorb the loads it was designed for.
At the same time, the rubber was still bonded to the outer shell. The outer bond was intact. The inner bond had failed, likely because the heat and load cycles had degraded the rubber, and the sand had then worked its way into the gap between the rubber and the steel.
The Outer Shell: Still Fine
The outer shell showed no signs of wear. It was still properly pressed into the control arm, with no rotation or fretting against the control arm bore. The control arm itself was fine. The bushing's failure was internal.
The Three Failure Modes (Again)
Like the CV axle, this bushing didn't fail for one reason. It failed for three, in sequence.
Failure 1: Heat Aging
The rubber was old and heat-aged. 18,000 miles of off-road use, much of it in the Arizona and California deserts, had degraded the rubber compound. It was harder, less flexible, and more prone to micro-cracking.
What I should have done: Replaced the bushings at 60,000 miles instead of waiting. The factory service interval for bushings is "inspect, replace as needed," but that's for pavement use. Off-road use halves that interval. I should have inspected them at 60,000 and replaced them proactively at 70,000.
Failure 2: Chemical Bond Failure
The rubber separated from the inner sleeve. The bond degraded from heat, load cycles, and age. Once the bond fails, the bushing no longer does its job — the metal parts start moving relative to each other instead of the rubber absorbing the motion.
What I should have done: Not much — bushings fail, that's what they do. But I could have caught the bond failure earlier if I'd done a more careful inspection. A pry bar on the control arm would have shown the movement. I didn't do it because the bushing looked fine externally. That was my mistake.
Failure 3: Contamination (Sand)
The gap created by the bond failure allowed fine sand and grit to work its way into the bushing. The sand acted as an abrasive, accelerating the wear and widening the gap.
What I should have done: In a perfect world, the bushing would have failed from heat aging and bond degradation, but the contamination made it worse and faster. To prevent this, I should have been more thorough with underbody cleaning after desert trips. A power wash under the control arm mounts after a desert trip would have reduced the sand that got trapped.
What You Can Learn from This
Here's what I took away from this autopsy, and what you should know before your next trip.
Bushings Don't Look Bad When They Fail
This bushing looked fine from the outside. I looked at it during pre-trip inspections and saw no cracks, no tears, no weeping. The failure was entirely internal. The bond failure between the rubber and the steel was invisible from the outside.
What to do about it: You can't always see bushing failure. But you can feel it. Check for suspension slop with a pry bar or by shaking the wheel at 9 and 3 o'clock. If there's movement, the bushings are worn.
Alignment "Walking" Is Often a Bushing Issue
The alignment on this truck would not hold. I'd get it aligned, drive 500 miles, and the toe would be out again. A shop recommended a new steering rack, which would have been $1,500.
It was bushings. $240 in parts and $100 in labor. The alignment held after I replaced them.
What to do about it: If your alignment keeps walking out, bushings are the first thing to check. They're cheaper than racks. It's a lesson I've learned more than once, and I'm repeating it here because it's easy to forget.
Off-Road Use Halves Bushing Life
The factory service interval for these bushings assumes pavement use. Off-road use — dirt, rocks, water, sand, washboard — cuts bushing life significantly. Heat degrades the rubber. Sand abrades it. Water gets into the gaps and accelerates rust.
What to do about it: Replace bushings proactively if you're a serious off-roader. At 60,000-70,000 miles, just do them. They're not expensive, and the improvement in steering feel and handling is immediately noticeable.
Sand Is Abrasive
This is obvious. But it's worth repeating. Sand gets into everything — bushings, ball joints, tie rod ends, CV boots. It acts as an abrasive and accelerates wear. If you run sand dunes or washboard desert tracks, you need to inspect and clean your suspension components more often than someone who wheels in mud or snow.
What to do about it: After a desert trip, power wash the undercarriage. Focus on the suspension joints and bushing areas. It's not a guarantee that sand won't get in, but it reduces the amount that's trapped there and helps you catch problems earlier.
The Tag on the Wall
I hung this bushing on the Parts Graveyard wall with the following tag:
DATE: April 2025
LOCATION: Removed in the shop after a Utah trip, but the damage was done in the Mojave desert of California — approximately N35°14' W116°04' area, the washboard sections of the Mojave Road and adjacent trails
PART: Front lower control arm rear bushing, OEM replacement, 5th-gen 4Runner
MILES ON PART: 18,000 off-road miles (post-rebuild), 40,000 total on the control arm
FAILURE MODE: Heat-aged rubber → chemical bond failure between rubber and inner sleeve → sand contamination
CAUSE: Off-road use in sandy, hot conditions combined with inadequate bushing inspection interval. Failure was visible only on cut inspection.
LESSON: A bushing that looks fine externally can be completely failed internally. If your alignment wanders and the rack checks out, replace the bushings. They're cheap. And don't let a shop sell you a rack until you've ruled out bushings. I nearly made that mistake.
How to Check Your Bushings
Here's how to diagnose worn bushings without cutting them open:
Visual Inspection
This is the first step, and it's not enough on its own, but it's where you start.
Look for cracks on the outside of the rubber surface
Look for weeping grease or other lubricants
Look for metal-on-metal contact where the control arm might be rubbing against the frame mount
Look for evidence of rust or corrosion on the steel components
Look for irregular wear on the tires (bushings that are worn may allow the tires to wear unevenly)
Tactile Inspection (Pry Bar Test)
This is the most reliable way to check bushings without removing them.
Place a pry bar between the frame and the control arm.
Apply leverage and look for movement. The bushing should flex, not separate. If the inner sleeve visibly moves relative to the outer shell, the bushing is worn.
Check for clunking or clicking sounds that indicate the bushing is moving under load. Listen carefully.
Check all four corners of the control arm — front and rear bushings on the lower arm, and the upper arm as well if you have them.
Steering Feel Test
This is subjective, but you'll know it when you feel it.
Drive on a straight, smooth road and let go of the steering wheel briefly. Does the truck wander off line? If yes, check the bushings.
Turn at moderate speed. Does the steering feel vague and unresponsive? If yes, check the bushings.
Brake hard. Does the vehicle pull slightly to one side? If yes, check the bushings.
Road Test: The "Three O'Clock" Test
Park the vehicle on a flat surface and shake the front wheel at the 9 and 3 o'clock positions. If there's movement, it's either tie rods or bushings. With the suspension loaded, it's often bushings.
Conclusion
This bushing is on the wall because it was a completely preventable failure. The bushing failed internally where I couldn't see it, but the symptoms were there — wandering, alignment drift, vague steering. I ignored those symptoms because I was looking for a bigger, more expensive problem.
If your alignment keeps walking out and your steering feels vague, check the bushings before you replace the steering rack. They're cheap. They're easy. And they're often the cause of the problem.
If you're running off-road with any regularity, replace your bushings proactively. At 70,000 miles, just do them. It'll save you the wandering, the alignment, and the frustration of driving a truck that feels like it's pointing in the general direction you want to go, not going there precisely.
I've got the bushing on my wall to prove it. You don't need one on yours.